Fix a failed WHS system drive

I have a love-hate relationship with my home server. I’m on my second, the current being the HP Mediasmart 495ex. There’s a lot to love about this system, it’s flexible, mostly reliable, simple to maintain and easy to expand. It gives me lots of space on the network to backup files and serve media to the internal network.
There’s also a few major blind spots that I hate. One became very apparent recently when the server stopped responding. Rebooting the server would bring it back up on the network and everything would work fine for a little while. A bit of searching around led me to the excellent (and free) Home Server SMART add-in. This handy add in provides functionality that really should have shipped with Windows Home Server, it reads the SMART information off of your hard drives and provides warnings if a drive seems likely to fail soon.
As soon as I had installed the WHS Smart add in, the health light on my server turned red and it threw up a warning that the system drive had multiple read errors. Uh-oh.
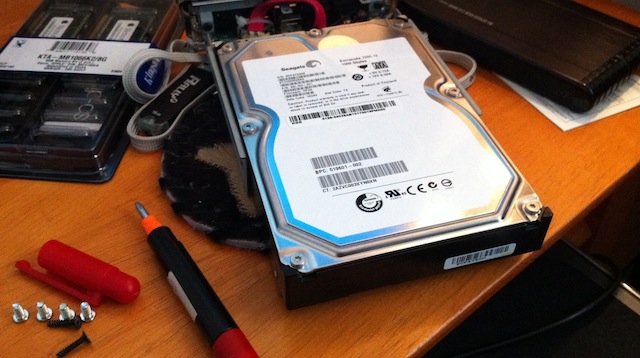
At least this helped to narrow down the problem, my system drive was failing and needed to be replaced. OK, but how do you do that? On any additional data drive you can simply swap it out, but here’s a giant blind spot in the design of the original WHS os: The system drive is included in the drive pool, but can not be swapped out.
If your system drive has problems you’re pretty much screwed. Or at least that’s what it looks like. In fact you can fix this problem, cloning the system drive and with a little extra effort get it back to life. Why they never provided a simple way to do this is beyond me, it’s not a simple process, but here’s how I got my server back to life:
[GARD]
1. DIAGNOSIS
First step, make sure it’s your system drive that’s failing. The WHS Smart add-in is indispensible here and you should have it running on your system BEFORE you run into any problems. This will let you know of any potential problems as soon as they pop up.
2. BACKUP YOUR DATA
You’ll probably want to try to rescue any important files before you try this. If your server is running grab what you can off it. If you’ve got duplication running on every shared folder you should be fine anyways since anything on the system drive is held on another drive as well.
3. CLONING YOUR DRIVE
Here’s where it gets tricky. You can clone a drive using all sorts of software, but WHS will not recognize it if it has a different unique disk ID and your system will throw up all sorts of errors and be unreliable. This handy post tells how to work around that, and here are the specific steps that worked for me:
In that post Acronis is the recommended software to clone your system drive. There are multiple versions of that software, some paid and a couple of free version for seagate and WD drives. I was cloning from a Seagate to a WD drive, so I thought one of those would work. I was wrong. After multiple attempts I had no cloned drive and I didn’t want to buy more software in the hope that it would work, so I did a bit more research.
Then I found Clonezilla. This is brilliant free software that works a treat. I used Tuxboot to automatically download the latest version of Clonezilla and create a bootable USB drive with this software on it. I then set the bios in my second PC to boot off the USB drive and plugged the failing system drive and the new blank drive into external USB enclosures.
Clonezilla is not terribly pretty and its interface can be kind of intimidating. The important thing is to make sure which is your source and which is your target drive. If you do this wrong you can overwrite your failing system drive with the blank drive and then you’ve really lost everything you wanted to pull off of it. For me this was easy since my source and target drives were two different brands, but be extra carefull with this step. Here’s a walk through with screen grabs on how to clone a drive.
I first tried the automatic no error correction version of cloning and it failed. Not suprising since my source drive is failing. I then tried the repair errors option and though it threw up some errors for lots of dead sectors the cloning completed. I then took the new clone drive, put it in my server and booted up. One nice thing about this method of cloning (asides from being free) is that it clones the unique disk ID as well so that’s one less step you have to do manually.
As you can imagine, I was quite happy to see my system boot up with the new drive. Not only did it boot up, it was more responsive – the console loaded up quicker and everything felt faster. I’m guessing the system disk errors were slowing everything down.
4. EDIT REGISTRY
Here’s the final tricky step outlined in the original post by YMBOC. We don’t have to change the unique disk ID since Clonezilla takes care of that and if you used a drive that’s the same size you wont have to edit the start and offset data. The one thing you will have to edit is the manufacturer data if you’re using a different brand of HD like I am. Here’s how to do that:
24) Go to the Start Menu. Select Run. Type “regedit”. Press OK.
25) Updating the Name of the System Drive as it appears in the WHS Console “Server Storage” Tab:
In Regedit, navigate to HKEY_Local_MachineSOFTWAREMicrosoftWindows Home ServerStorage ManagerDisks.There you will see a key (looks like a folder) for each drive that’s normally a part of your WHS system. Find the key that has “System” as its FriendlyName (in the right-hand pane). You can identify it by the key’s name which will begin with the same DiskID you set in part 2 of the instructions.
Navigate to the Attributes sub-key of the key you just identified.
Double-Click on ManufactureName in the right-hand pane and Enter the name of your new System Drive as it appears in the WHS Server’s Device Manager under the disks heading.
FYI: You can quickly access the Device Manager by going to the Start Menu, Right-Clicking on ‘My Computer’ and selecting ‘Manage’.
Check out the original post for more info.
[GARD]
5. DONE! (NOW WAIT)
Now you should be done! It’s time to reboot your server and try it out. When I rebooted my system it was still doing a few weird things. When I went to server storage in the console the ‘calculating size’ green bar seemed to run forever and the shared folders tab showed ‘unknown size’ for many of the folders. Uh-oh.
But here’s where the interruptions of real life came in handy. I had to leave for a few hours and when I came back all of the folder were showing their size and the server storage tab showed the pie chart. So give your server lots of time to incorporate the new drive before you get too concerned about storage display problems.
As of this writing the server has been running for few days with no signs of any more problems. All of my data appears to be intact and this little scare has served as a reminder: use duplication on any folders that are important to you.


